Plain white MacBook made awesomer!

When pondering if I should buy a MacBook or a MaxBook Pro one thing that talked against the MacBook was it’s plain whiteness. I decided for the cheaper alternative but I did not accept the whiteness. This is my journey towards getting this awesome tentacles on my computer.

1

The first thing I did whas deciding on a motive, and there are a lot of nice things to do and loads of inspiration to get at such places as deviantart and the internet in general. A few things I really liked was the snowwhite motives that are available to buy. But by this time I was so set on making something unique. So I made a tentacle motive.
Since I cant draw very well this proved to hard so I cheated 🙂 a few google imagesearch I found a bunch of tentacles that I could use. These I “photoshoped” together and printed. After that I stenciled that image with the help of a window and the sun.

2

Ten I photographed this image in a better setting. Then back to the computer to and some searching on the internet. I looked around for skin shops and or sticker places that could do a good job. But I found no skin that I liked and all the “convert photo to sticker for your computer” places had no way of telling where the apple would be. I did not want to loose the glowing apple. Then I found  a local place www.stickit.se/ and they had this vinylcutter service. Excellent. But they wanted an EPS. So I had to learn how to do one. I could try and redraw my image in some program that makes vectors, but that seemed hard and time-consuming. But I remembered Inkskape that I used before and behold I rememberd correctly. Inkscape can export EPS files. Then luck stroke again, delineate takes an image and converts it to SVG. After playing with the contrast and brightness levels I got this picture that that translated into a EPS beautifully.

3

So yeah, I sent the EPS to stickit and they sent me the plastic and all I had to do was to transfer it onto my computer. I’m very satisfied with the result.

Very satisfied!

Binaural beats and Atari Punk Console followup

Long-time reader of this blog may remember me having an idea of creating a binaural beat generator based on 2 APC. real all about it here http://www.larsby.com/johan/?p=67.

Well so, I made it. I was going to make a few APC’s anyway so I might as well test the idea.  I used http://www.electro-music.com/forum/phpbb-files/thumbs/t_apc555_129.gif so I could try and make a stripboard.

So yeah, the pot’s have a little bit of a glitch in them, kinda ruins the experience, and that is why I had to edit the video so hard.

Listen to it in headphones and tell me you don’t get dizzy.

Here’s a zipped wav-file in case youtube doesn’t do stereo properly. binauralbeatAPC.wav

If you want to make one yourself do 2 of the above APC, connect the pot’s to stereo versions of it. On of the cables between the pot’s add a new 10k pot between. Also if you don’t connect the batteries at the exact same time you will get strange phase’s. Very nice!

Crochet

2009 Oct 20 64 2009 Oct 20 155

In Sweden we have “slöjd” in school. That is both woodworks/metalworks and also stuff with textiles. The reasoning is that every one when finished shall be able to do some basic woodwork and sew back a loose button. I was more interested in the usage of powertools and saw’s but we were all forced to do at least a few semesters of textile-work.

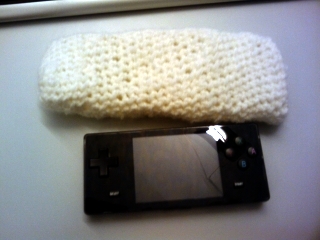
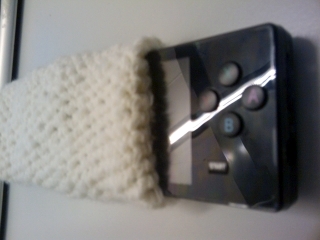
I have, I think, learned both to sew,knit,crochet and other things along those lines. but that was 20 years ago. So this Sunday when I wanted to make a pouch for my dingoo I though I should learn to crochet. I’ve already mastered the art of knitting scarfs and cap’s.

So I went and bouth a crochet needle, and started watching instructions on instructables, howto and youtube. This Sunday it went crap. As you can see on this image it did not become so pretty. And it’s the third one I tried. But in all fairness, I was watching TV, riding my exercise bike and crocheting at the same time.

2009 Oct 20 150

Yesterday, after a good nights sleep and a fruitful day of work, I came home and gave it a try again. Behold, I was successful to the extreme. Not only did I not make it look extremely ugly, and uneven. I even managed to make a baseplate and then round-crochet until I had a pouch for my dingoo.

When I was proud over the base-plate, my wife told me I was pretty gay. Mohahahaha. Tonight I’ll make her something.

A gift for my sister

GRATTIS LOTTA!

AA_ii

One of my kid sisters has her birthday-party today, and I wanted her to have a blast of nostalgia. When we where kids parties used to have at least one of these cactus of candy. So me and the kids made one for her.

Ingredients: A pot, a cucumber, wasabi nuts, toothpicks (wooden), gel-raspberries and poky sticks, plastic foil.

Cut the cucumber and isolate the cut so that id don’t get the nuts wet…… The rest is pretty obvious.

Hope she likes it, and thank you wordpress for letting me make this post in advance and setting a timer on it so that it doesn’t ruin the surprise.


AA_i

Making a gift

I made this photo as a present for my friend Christian. I also made the frame, it’s not as awesome as the picture though.

The idea came when I bought that hat, in Swedish it’s called a sydvest, and I was parading around the office with it, I threw the idea out that one should make a “old fisherman” style photo, here is one I found on the internets to let you get the idea. The corn pipe was the cheapest I could find. I don’t really cared to put a lot of money on that prop. The kids want it to blow bubbles with tough.

So the kids and I had an evening of shaving, putting up lights, taking photos and manipulate them. The next day I ordered a 40*50cm large photo. It arrived the next day (yesterday) so I made a frame quick and dirty so I could give it to Christian today. All I hope for now is a laugh and that he really hangs it in his bedroom as he promised 🙂

Finaguppen

UPDATE: The gift was delivered and was well received! all is happy rejoice!

Wooden amp-box.

DSCF2219

This summer me and the kids built a little ghettoblaster I was thinking of bringing to the Norbergfestival. Sadly though I never brought it to the festival, since in it’s current state doesn’t produce enough volume for outdoor-listening (in hi-fi atleast)

DSCF2212

What we did was basically:
* Get a few planks to build the shell.
* Use magnets for the door.
* Using a LOT of glue to isolate the speaker boxes
* Adding foam behind the speakers before sealing of (even more glue)

Here is a little video of when we where  WIP.

DSCF2214

For amplification we first used some 0.5w RubyAmps that are great for smaller amplification projects, unfortunately they where not powerful enough to drive the speaker-elements. So I went and bought a kit from 41hz. 41hz stuff really really rule. To bad I accidentally fired the amplification IC on it when I was putting it inside the box. I orderd a replacement IC pretty fast, but in the mean-time I used two 1w amps I had for some other project. I have made one halfheartedly try to replace the IC on the circuitboard, but I really need to drill the old one away. Perhaps I’ll fix that one day.

For now it is awesome to have it as amp to my computer and or when I work outside. It’s stylish don’t you think?

oh yeah, it’s only 4.6kg

Experimentation with shitwave

Last week, or if it was the week before I signed up at 8bitcollective, a site for fans of chipmusic and 8bit aesthetics in general. I was doing this while I was having a little Nintendo revival at home, trying to get the Game Boy Advance up and running and trying out LSDJ. In that process I found a little game boy program called Shitwave. it’s written by Nitro2k01 over at http://gameboygenius.8bitcollective.com/wordpress/ .I found this to be really interesting and I’ve wanted to do some noise music for a while, so I had a stab with Shitwave as sound source. I also used a boss betal distortion and a danelectro fab echo that I have previously circuit bent.

here’s a video, enjoy!

also you could go browse it over at 8bit collective: http://8bitcollective.com/music/larsby/Shift+8bit+noize/ There’s also an mp3 for you to download if you need a new ring tone for your mobile!

Binaural beats and the Atari Punk Console

So I’ve been thinking about this idea for a few days. First of let me explain the idea.

The Atari Punk Console is a piece of gear that has been around a long time. It’s a noise machine that makes some noises that are similar to an Atari, at least in the mind of the creator.  More about this can be read up on over at Wikipedia http://en.wikipedia.org/wiki/Atari_Punk_Console

There are a bunch of videos of it running over at the tube, two of them are mine http://www.youtube.com/watch?v=DyWNBLDJvTg and http://www.youtube.com/watch?v=5wIDqMIzRdk.

Binaural beats is the brain interpreting sound coming in to left and right ear with a slightly different frequency. This makes the brain align to these low frequencies and setting it’s working pace. This is very similar to that blinking light you can try on different festivals and such. This has the effect of you getting relaxed or hyperactive. More reading at Wikipedia as per usual http://en.wikipedia.org/wiki/Binaural_beats.

So what has this to do with me? well, I’ve tried a few binaural beats and they work pretty well on me, I get relaxed or hyper. There has been more research in the area and there has been tests on lowering frequencies and using water or stuff as the source to get more extreme effects.

And what do you get if you make a stereo Atari Punk Console with an extra knob for shifting one of the APC’s? A deranged Binaural beat machine I hope 😀

So I’, ordering part’s for two APC’s with stereo pots for all the usual settings one can make, and then I’m going to experiment to see where there will be the best place to put either a knob or a capacitor, or perhaps a combination.

Down here is my shopping list (at http://www.electrokit.se).  it’s about 5dollars without the extras needed to skew one to the side, but I have plenty of stuff at home to cope with this.

40811347 MF 0,6W 1% 4,7K 2 0.35 0.70
40813310 MF 0,25W 1% 1,0K 4 0.28 1.12
40813410 MF 0,25W 1% 10K 2 0.28 0.56
40512410 MKS2 10nF 63V 5mm 2 1.60 3.20
40512510 MKS2 100nF 63V 5mm 2 1.28 2.56
40521001 YXA 10uF 50V 105C 5×11 2 0.5 1.00
40350556 NE556 DIL14 dubbel timer 1 6.50 6.50
40910230 Pot 100 kohm lin PCB stereo 1 8 8.00
40910232 Pot 500 kohm lin PCB stereo 2 8 16.00
41001294 6.3 mm chassi stereo 1 8.00 8.00
40210001 Batterikontakt 9V 1 2.40 2.40
40220024 Vippomkopplare 2-pol on-off-on lödöron MTS-203 1 7.20 7.20

RedString

,---.         |     |         o
|---',---.,---|,---.|--- ,---..,---.,---.
|  \ |---'|   |`---.|    |    ||   ||   |
`   ``---'`---'`---'`---'`    ``   '`---|
                                    `---'

________________________________________________________________________


This is how it looks and this is how it sounds

Yeah, uhhm, I wanted a little guitarish thing to play powerchords on.
You know to bring to festivals and impress girls and all that.
Something that is easily connected to my little amplifier, that I
made from an old mc-player, follow this link to check it out.

Anyways, I built this using an ukulele as size-model.
Ukulele strings, if you buy a 4 pack of ukulelestrings I used the fattest
next fattest and the thinnest.
I’ve tuned them to C, E, C (one octave higher) to play them powerchords.
I did not frett it, just drew with a pen on, if you want to fret it best
use a chromatic tuner for to find the sweetspots on the neck.
The tuning pegs are from a cheapo kids acoustic guitar, cheap but working.
A large pice of metal (actually a bbq pin) is bent to hold the strings down.
A pice of square metal is used as to lay the strings on.
Same pice of bbq stick is used to rest the strings at on the end of the
string instrument.
The pickups are piezo discs connected in serial to increase the volume.
And the jack is a standard guitarjack.


Top View


Back.


Dont do mistakes, then you have to glue stuf together.


Side of head.


Back of head.


The jack from behind.
Forgot to take a closeup photo of the unpainted front, sorry.

A bunch of tips:
* Pizeo tutorial at Erinys superb how-to
* Get the tuning pegs first, and measure everything, otherwise you will end up with
a few more holes then expected (as I did)
* You can use metallic strings, but that its not needed with piezos.
* Try different placements on the picups before attatching them (you can alter the
sound pruduced radically, I went four loud volume though)
* Have fun.

And Finally some pictures of me rocking out on it.


Opal

What why?

A while ago I found an interesting post on the arduino forums about
a guy who made a 8×8 LED panel for his friend to use to visualise when
playing music. So when I was browsing my local thrift-store
I found an old slide viewer (for you kids, it’s an old pre digital way
to take photo’s).

-Hell yeah I thought (but in Swedish) this would look sweet if I mounted
a bunch of LED’s in it. So i bought it for 15 SEK. (1.51 EUR or 1.9 USD)

Hardware.

I have already made almost all of the arduino-code I needed on my
moanonme. Also the 8×8 LED matrix is no mystery to me. If you want to
recreate it it’s dead easy. First you read the shiftout tutorial on
arduino.cc and make one of those a bit more permanent. After that you
make 7 more rows with led’s and connect each row’s gnd to a different
pin on the Arduino. Then with a little bit of code magic you write to
the shift register which led’s that are on on a specific row. that row
being set to “read” in the software forcing that row to be the only one
that is lit. By doing this superfast you’re eye wont notice the difference.

This might sound easy, and it is, unless you do it on a small scale. The
Lens on the slide viewer was only 3*4cm so I needed LED’s that would fit.
I found some green that fitted perfectly. I tried to glue them toghether
first but in the end that was all a big heap of fail. easiest was to use
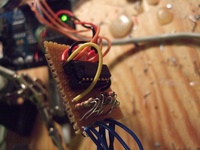
a perfboard and mount them on that. I used an iDuino board since these are
smaller and thus easier to mount inside the pretty cramped battery
compartment inside the box.


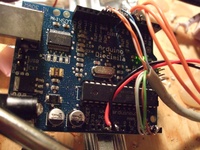
Decimilia used for prototyping

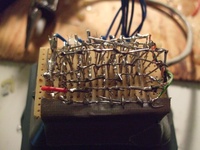
Backside of LED matrix

The 595 chip shiftout for the led’s

Software

There where a few features I wanted of the finished build. I wanted to
easily create sprites/images. And I wanted to be able to controll the
displaying of the images from within Ableton Live. Prefferably as a
MIDI device so I would not have to code yet another VST.

So yep a very tiny little Arduino program which you can get here

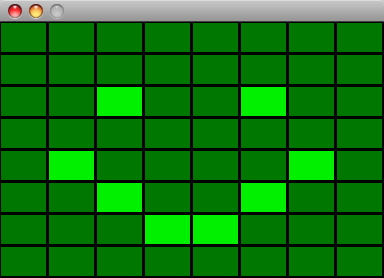
So I made a little processing sketch that let’s you draw on your computer
screen and both show it there and on the device. This was as really easy.
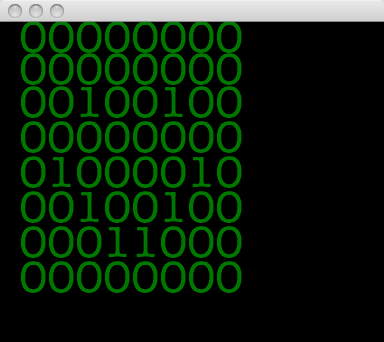
Press 2 to paint, 3 to erase and 1 to print the image in data format so
I can copy-paste it to a server program. I choose to print the data in a
human readable/modifiable code so I could change it without the program if
I wanted to.

Here it is if you want to play with it: opalpainter.pde (you’ll need
processing)

So to the serverside. Easypeasy aswell as always with processing, chose
another type of visualisation though. It all worked well until I tried
to get any of the MIDI processing solutions to work. fail fail fail.
It works though, and here it is for your playing fun: opalserver.pde
1 and 2 to flip between your images

So in the end I reused stuff from the moanonme project. os x serialport and
MIDI in from a totally own port. Most of this code is not written by me
although I’ve seen that os x serialport stuff on more then five different
places on the internet so I’m not really sure who’s the original author.
Anyways, this program listens to midi-in and tells the arduino to display
graphics I hooked up to the current MIDI note. get it here

The video

What would a build be without a video? nothing, since nobody reads these text’s
of mine that’s what!

Total Cost:

Arduino iDuino 17.82 USD
Diabildsvisare 1.91 USD
LED’s 4.57 USD
some wire and solder 1 USD
——————————-
Total 25.3

just below 200 SEK, NICE!